Burchfield Park, Holt, MI
April 4th, 2015
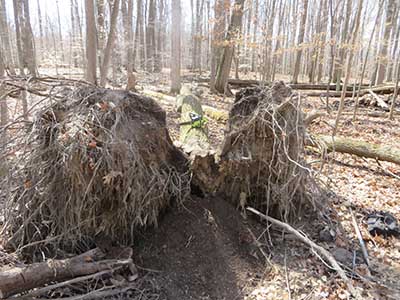
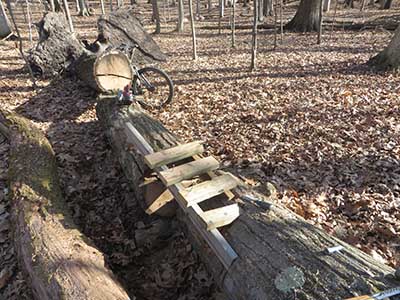
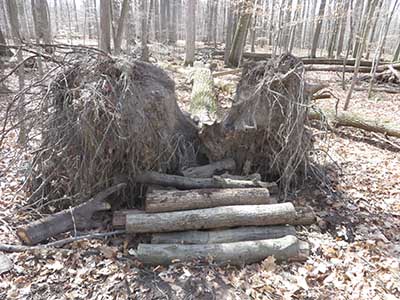
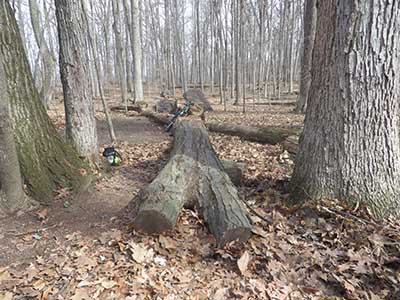
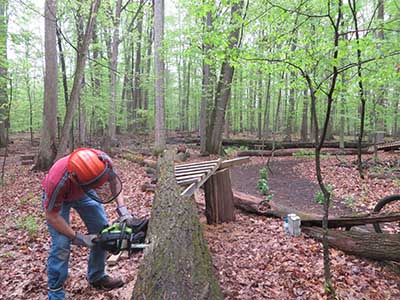
This tree uprooted last year, conveniently near the existing (2013) stunt on Hansen's Be-Bop. It runs parallel to the advanced trail, and we'll be able to enter to it from the advanced trail, then exit from it through the rootball and back onto the advanced trail. If only all trees in the park could fall in such a considerate manner!
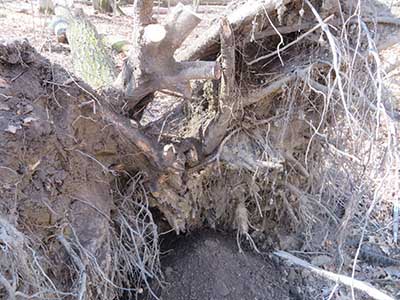
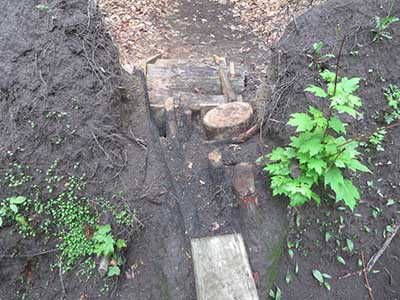
This shows a bit of progress made on hacking through the rootball to create an exit line. I used a shovel and garden trowel to remove as much dirt as possible, a hatchet to chop out the smaller roots, and then my chainsaw to cut through larger roots. I switched to an old, bad chain to cut the smaller of the larger roots, but it was so bad it wouldn't cut through the bigger ones. I had to switch to my good chain, and it definitely messed it up. Had to be done.
This should be wide enough to ride a bike through. We'll see, I may have to widen it. It's hard to see with this small picture, but there are still a few root "stumps" sticking up in the intended exit line. I may deck this part in such a way as to leave them protruding a few inches above the deck, adding to the character and challenge.
April 5th, 2015
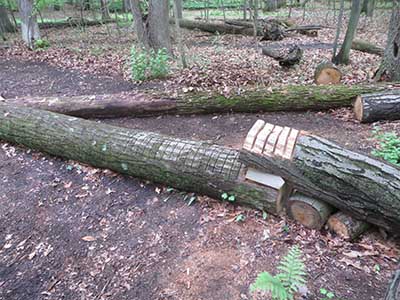
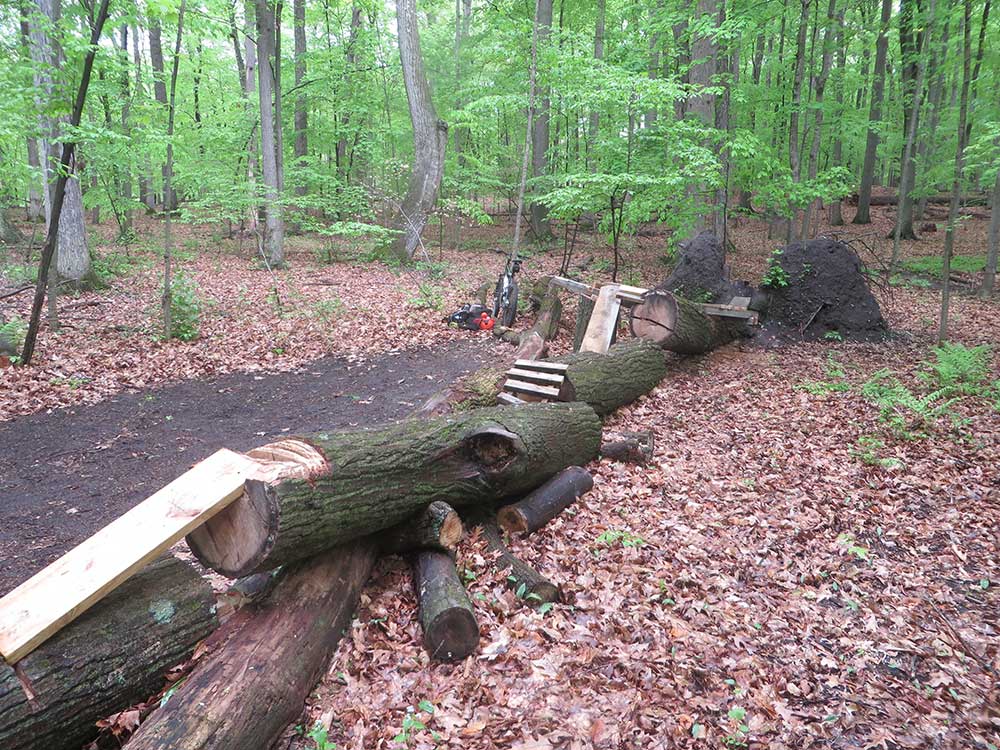
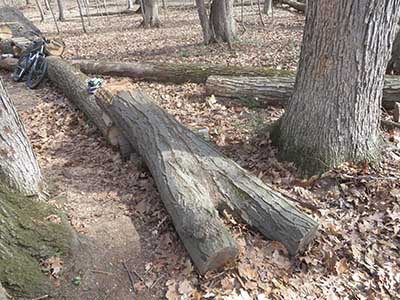
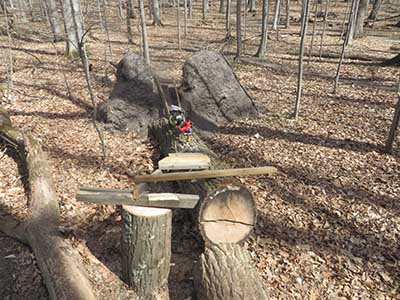
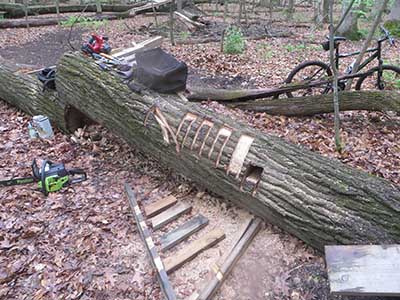
The view from the entrance, you can see that there are several different sections. There are five sections, with the final section ending at the rootball. I'm working on the entrance ramp to the third section in this picture. That's a 2"x10", and I was one-for-one on the test ride of it. This tree is so thick that I don't really need to deck it, it can be ridden the way it is.
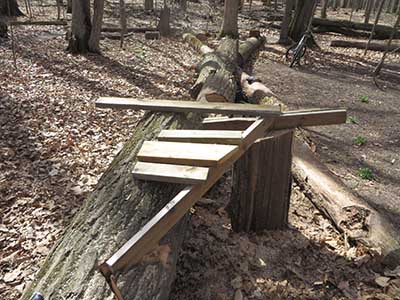
The transition ramp from section 2 to section 3. This was originally supposed to be a beginner line, but I think that it's high enough off the ground that many will not want to attempt it. So, it will be an intermediate line - with an exit ramp to the ground at the end of section 3. Advanced riders will continue to sections 4 and 5, exiting through the rootball.
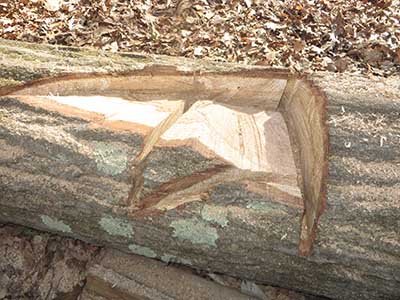
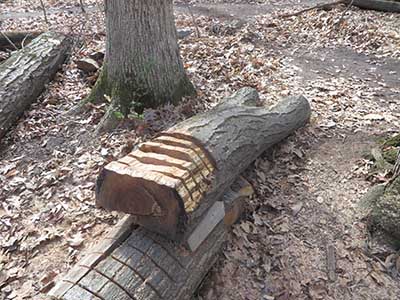
With the ramp removed for the photo - a little notching on section 2 (bottom) to prevent the ramp from moving around, and a lot of notching on section 3 (middle) to allow the 2"x10" to fit snugly in place. I test-rode it without nailing it in, and it was fine. Water-proofing will come later.


April 12th, 2015
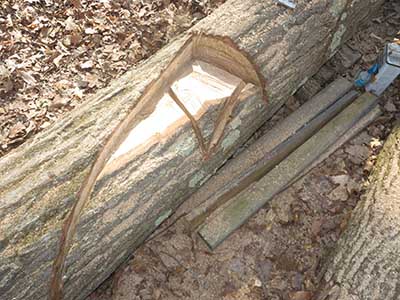
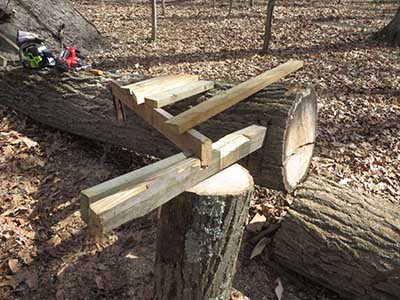
For the ramp connecting section 3 to section 4, this shows the water channel work that the boards will fit into. I'm starting to widen some of my water channels so that I can clean them out more easily - they get filled with sawdust and that defeats the whole purpose. The scrench seems to be working better than the chisel is for that task now.
This ramp has two slightly uneven stringers, and whenever this happens, I try to carve out one of the boards slightly, just enough that the deck board sitting in it will not be able to wiggle back and forth. I figure that even with it nailed in, it's better not to leave it any way to move around.
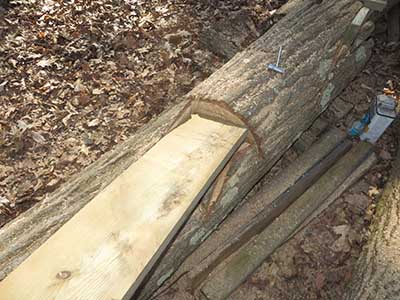
The notch in the previous picture is for the topmost board on the ramp shown below. All of the boards required this operation in order to make them lie flat. The leftmost stringer will be cut shorter later, even though I was able to ride past it today and it didn't get in the way.
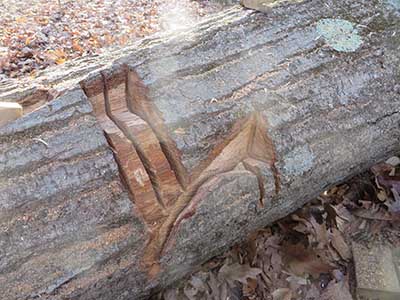
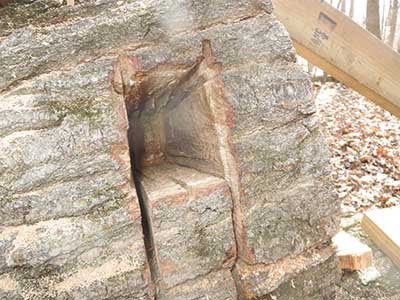
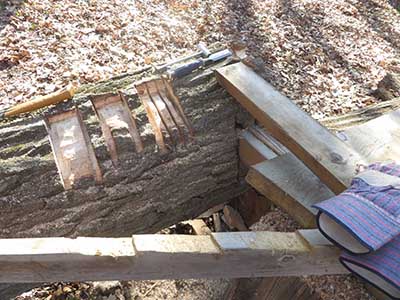
For the ramp connecting section 4 to section 5, I am going to go out wide to the left (with possibly something else on the right as well). For a foundation, I created a "gangplank" today, cutting a hole into the side of the last section, which is connected to the rootball. You can see the deep water channels on each side of the hole.
On both of the two 2x4's that I put into the hole, I use a nail to scratch in some depth indicators, so that I can see how far in I have been able to place these boards. In the picture below, the board is about 9 inches deep into the hole, but afterwards I was able to get them in about 11 inches. It's very strong.
I'll cut these off once I determine how long they need to be. You can see on the nearer board that the end is broken up - I drive the boards into the hole with my hammer to make sure they are tight.

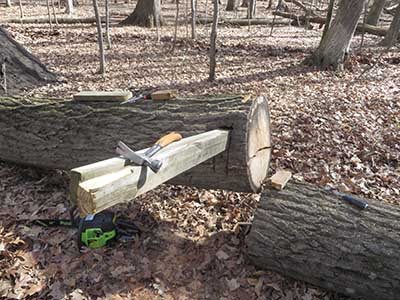
Here's a look at the current state, with sections 2, 3, and 4 in basically their final form. I test-rode those sections three times today, falling only once - from the top of the first board, when I was going too slow at the top and stalled out. Banged my knee on the way down, but was able to land and roll without any further damage. I'm glad I already cleared the sticks out of the fall zones! Later on, I'll rake the leaves out as well, and get rid of any currently-hidden rocks and sticks.
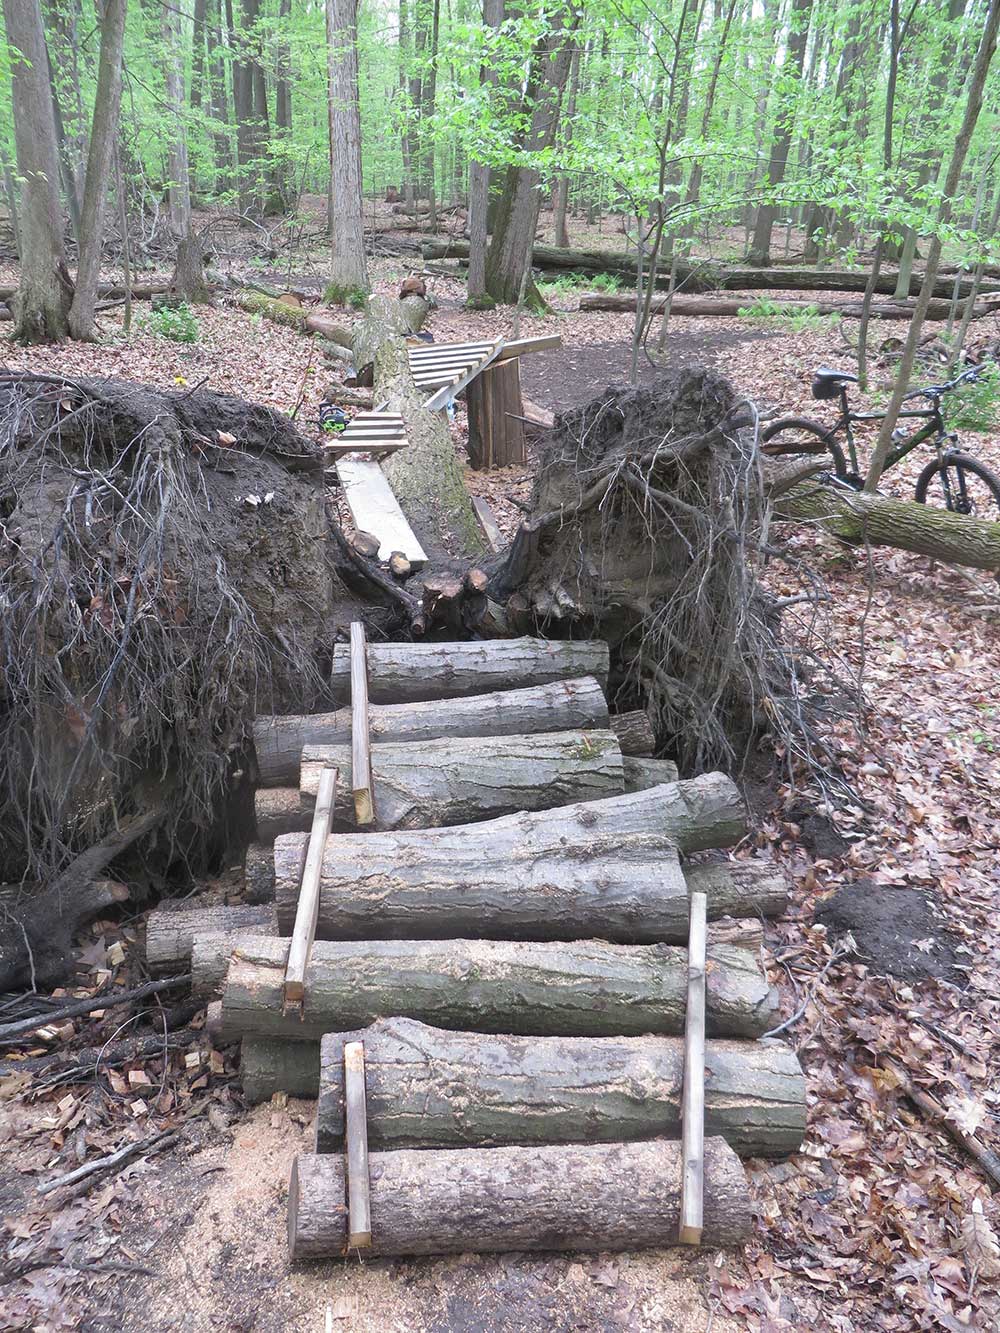
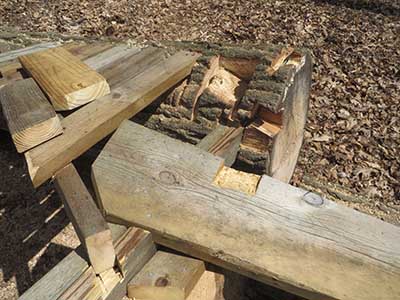
I did my own version of the World's Strongest Man contest today, carrying these small-looking but quite heavy chunks from the top of this log down to the rootball. The ones that were too heavy to carry had to be flipped end-over-end. I will either make this exit be a log-ride, or put a down-ramp on top of it, I'm not sure at this point. It depends how stable I can make such a pile, and how difficult it is to ride it. It would be nice to not have to use any lumber on this, though even with a logpile, it will probably require a bit of decking to connect it to the rootball.
April 18th, 2015
For the ramp connecting section 4 to section 5, this shows the water channel work in the notching that the board will fit into.
From a different angle. I won't waterproof anything like this yet, anything that is near enough to future chainsaw work to cause problems with sawdust clogging the water channels. These extra-wide water channels will make it easy to clean sawdust out, though, so I might start waterproofing sooner than I otherwise would.
With the board, a 2"x10", loosely in place, not nailed yet. With this notching and with the notching on the other end (the gangplank of section 5), though, I should be able to test-ride it without nailing it in, it's quite stable when I stand on it.
April 19th, 2015
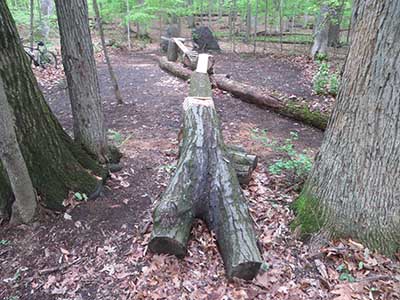
Thanks to two new-to-Burchfield riders from Battle Creek, I was able to get some help positioning this forked piece as the entrance. Ride it any way you like, but I've been working on going straight up the middle, between the two forks. I'm considering adding a small 2"x4" ramp in between the forks ... though I'm sure that would invite jokes!
Without a ramp, speed is an issue with this entrance, I was often going too slow after getting onto it, during test rides. Luckily, the trees on both sides are very conveniently placed for sticking out a hand or a foot onto them. I expect people will be putting sticks down to form their own ramps, if past experience is any indicator of future behavior. Please remove any you see, I WANT this entrance to be difficult, because it's pretty risky further along.
It's a rollable drop down to the second section, my chainring had at least a couple of inches of clearance once I shaved this end down. It's waterproofed now, just in time for tonight's rain. I expect that the bark-covered parts of this piece, and the entire stunt, will rot at some point, and then it can be cut down to the good wood (probably just a couple of inches) and waterproofed. It will be interesting to see how many years go by before that is necessary.
I spent a little time working on the transition between sections 4 and 5 as well. I was concerned about the strength of the gangplank after I had cut a fairly large notch in it to level out the up-ramp, so I cut a chunk of the fallen tree to put underneath it to provide extra support. I'd rather not have cluttered up the look of this transition, but it will provide extra safety.
I plan to fill in the top deck so that people can put a foot down once they are up on top. If people don't power up the ramp and keep their speed up, they'll stall out and need somewhere to put a foot down. At the back, I've laid two boards down to indicate where I might put the deck to use to go through the rootball.
The view back toward the entrance, with a bunch of boards laid on top to get a general idea of what it's going to look like. When it's done, it will be decked completely here.
April 26th, 2015
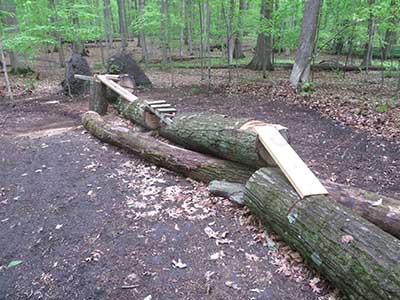
Waterproofed and installed this ramp onto section 3, as well as the ramp onto section 4 (see the third picture from April 12th above, where it is loose).
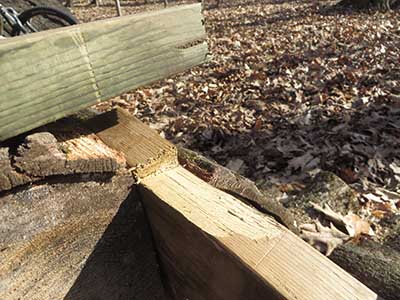
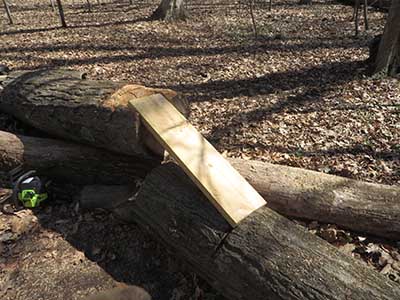
This ramp onto section 5 is a 2"x10" and I needed to fill in the opening at the top between it and the log, so that the back tire could track through there without getting stopped.
I used a 2"x4" and a 2"x6", sinking them into the log at an angle to match the up-ramp. I notched the up-ramp slightly to help the 2"x4" stay in place.
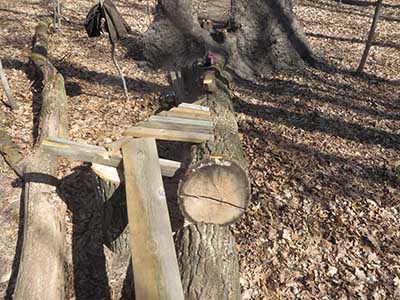
This shows some of the notching work for the boards on top. I lined them up, having learned my lesson on the Hansen's Be-Bop stunt that they don't look very good if they are just randomly set into the log. You can see the wide notching, enabling me to clean them out nicely before applying the waterproofing.
Side view, showing the nicer alignment of deck boards. This section turned out to be on a bit of an angle, but it shouldn't really be noticeable to anyone riding it.
This is what the finished ramp to section 5 looks like, with the first section of decking on section 5 itelf. I'm going to add another gangplank on the right side closer to the rootball, so that after you ride what you see here, you'll curve a bit out to the right and then line up for the exit over the rootball.
May 9th, 2015
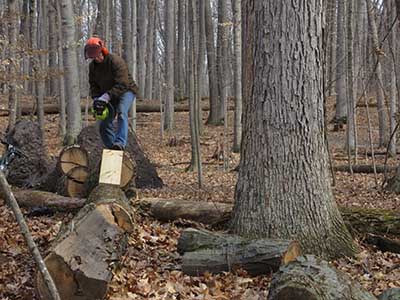
I was hoping to finish this stunt today, and I came pretty close. I added the last gangplank, on the right of section 5, then decked it. Here I am cutting the hole for the gangplank. I normally chainsaw with my face shield down (on top of my safety glasses), but here I had forgotten to lower it in the rush to get in front of the camera before the timer took the shot.
The gangplank hole and all of the notches are ready to receive the boards, laid out on the ground, permanently - the waterproofing is done. I cut all the boards and have everything in place before nailing them in permanently. Note the shallow notching in the board on the left - I like to make everything fit so that the boards won't move around even if they aren't nailed in.
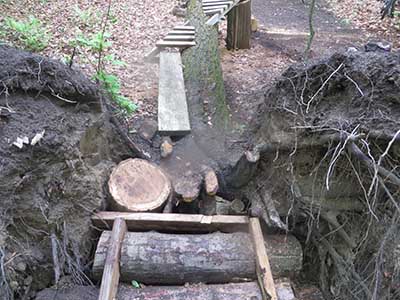
You can see the installed boards on the right. I added a 2"x10" to take you from those boards to the rootball exit. I didn't test-ride it yet, I ran out of gas stabilizing the exit logpile, and was expecting the forecast thunderstorms to start any time, so I just left.
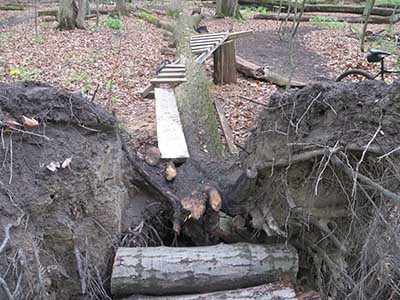
Here's the view from the exit back to the 2"x10". I'm not sure how difficult it will be to cross over this nasty-looking gap, I'll need to test-ride it and decide whether or not to add additional decking. There's a bit of a hole on the left before the first log, too, and I may want to fill that in, whether I add decking or not.
I added these stabilizers today, a couple of the logs, particularly the final one, were loose. I had one more to add in the upper right, but my chainsaw ran out of gas. It's pretty stable as it is, so it's not a big deal. We'll see how long it takes for this pile to rot out, and then we'll add a down-ramp instead. This is definitely an exit with character!
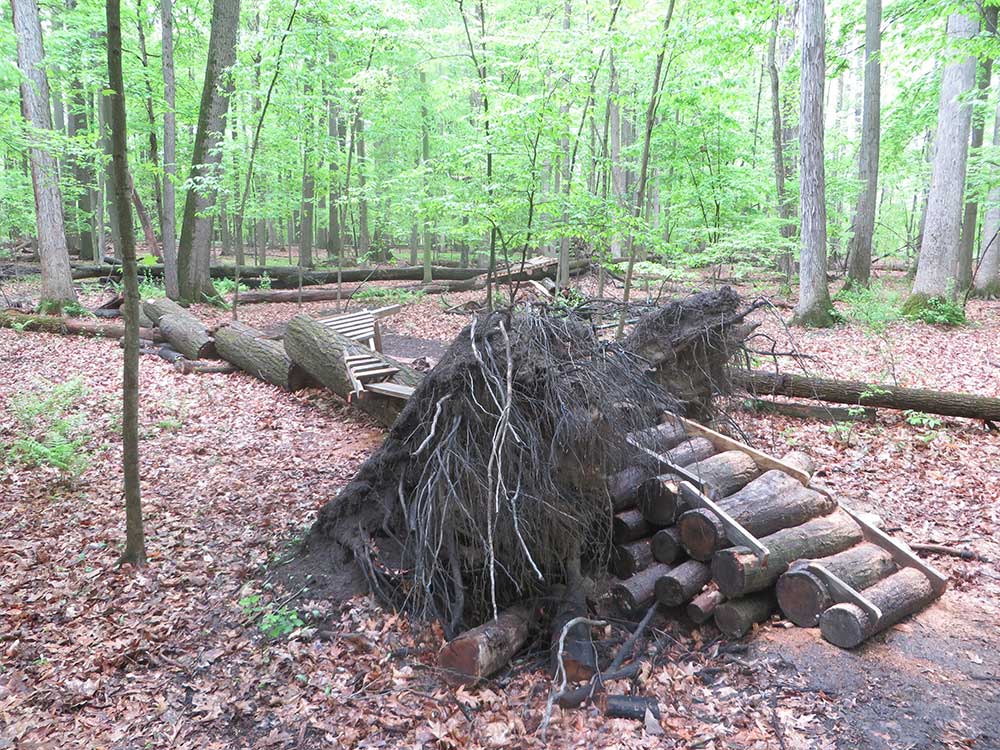
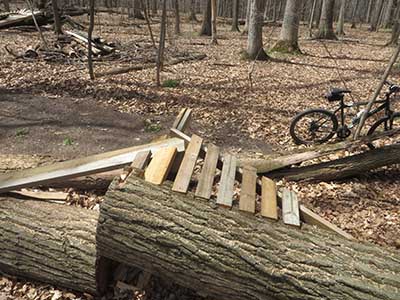
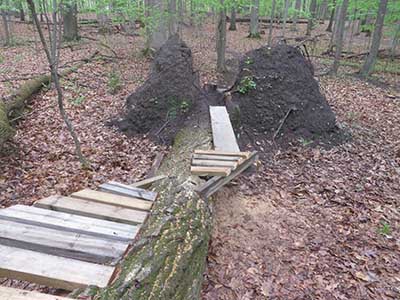
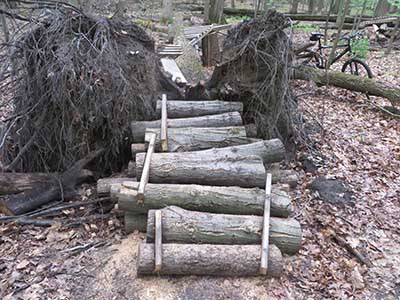
This is basically the final look of the stunt, though I see I took this picture before I added the stabilizers to the exit logpile. You'll have to imagine them in place. I'm not even sure this looks like a stunt! Pretty gnarly - I can hardly wait to ride the whole thing and get some videos.
May 16th, 2015
I finished it today, but it was too wet to test-ride it. Compare this picture to the one straight above and you can see that I filled the big hole. It's not that you're supposed to ride over the new plug, but it's there in case somebody needs to put a foot down. As you can see, this picture also includes the stabilizers for the logpile exit.
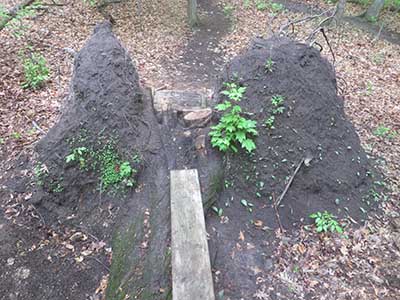
This is the view in the direction that you will be riding this stunt. I haven't test-ridden it yet, but I plan to have the front tire come in on the dirty tree trunk on the left side of the line, then lift the front tire completely over the bits of wood sticking up, letting the back tire drag over them on my way down the logpile.
Same view, from a bit further back. There are plants growing in the rootball dirt that weren't there a week or two ago. It could add to the character of the exit, but I may also have to clip them back every once in a while.
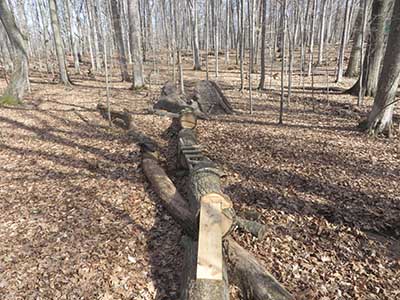
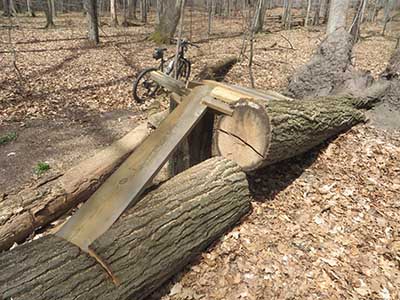
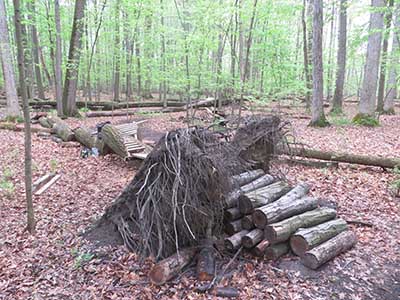
This is the Y-log entry, and a view of the entire stunt from the front. I like that this is a different sort of entry than any of my others, and it has the difficulty and visual intimidation factor that will keep people off of it that aren't confident about riding stunts.
This shows the end of the Y-log entry from the side. The fun thing about it is that as you drop over onto the second section, it's rounded and requires precision riding. If it puts you off the side, it is a pretty smooth drop of the front wheel onto the ground. You can see that I originally intended to flatten it down, since there are cuts at the start, but I've since decided to leave it like this.
A three-quarter view from the front that shows several of the transition ramps between sections, as well as the raked-out fall zones. You can see that I removed a lot of the old log on the ground to the left of the stunt, toward the end where I thought people would be more likely to go off the side.